Introduction
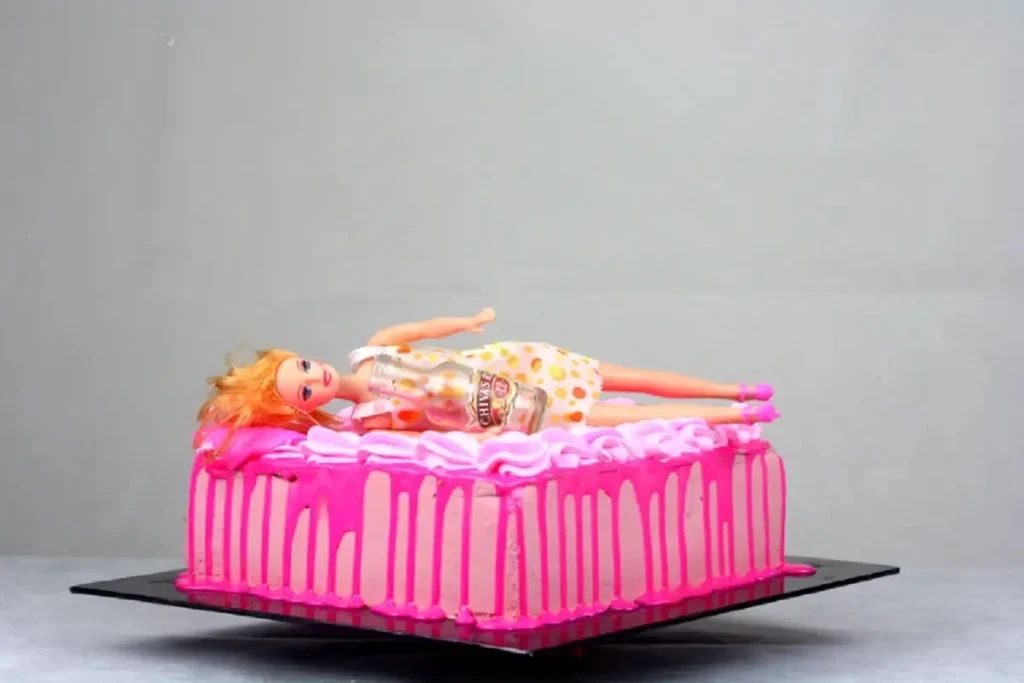
Barbie cakes have become a popular choice for birthdays, celebrations, and special occasions. These whimsical and eye-catching cakes feature a Barbie doll as the centerpiece, surrounded by layers of delicious cake and beautifully decorated with frosting and edible decorations. In this article, we will explore everything you need to know about Barbie cakes, from their history and popularity to step-by-step instructions on how to make your own. So let’s dive in and discover the world of Barbie cakes!
The History of Barbie Cakes
Barbie cakes first gained popularity in the 1960s when the iconic Barbie doll was introduced to the world. The idea of incorporating a Barbie doll into a cake design originated from the desire to create a unique and memorable birthday cake for children. The concept quickly caught on, and Barbie cakes became a staple at birthday parties and special occasions.
The Popularity of Barbie Cakes
Barbie cakes have remained popular throughout the years due to their whimsical and visually stunning designs. These cakes not only serve as a delicious dessert but also double as a centerpiece and a form of entertainment. Children and adults alike are captivated by the creativity and artistry that goes into crafting a Barbie cake. It’s no wonder that Barbie cakes continue to be a favorite choice for birthdays and celebrations.
How to Make a Barbie Cake

Creating a Barbie cake may seem like a daunting task, but with the right tools and techniques, it can be a fun and rewarding experience. Here is a step-by-step guide on how to make your own Barbie cake:
Step 1: Gather Your Ingredients and Tools
To make a Barbie cake, you will need the following ingredients:
- Cake mix or homemade cake batter
- Frosting of your choice
- Food coloring (optional)
- Edible decorations (sprinkles, fondant, etc.)
- Barbie doll
In terms of tools, you will need:
- Round cake pans in various sizes
- Mixing bowls
- Spatula or offset spatula
- Piping bags and tips
- Cake turntable (optional but helpful)
- Scissors
Step 2: Bake the Cake Layers
Start by preparing the cake batter according to the instructions on the package or your preferred recipe. Divide the batter evenly into the round cake pans, ensuring that each pan is filled about two-thirds full. Bake the cakes in a preheated oven until a toothpick inserted into the center comes out clean. Allow the cakes to cool completely before proceeding to the next step.
Step 3: Trim and Stack the Cake Layers
Once the cakes have cooled, carefully remove them from the pans. If necessary, trim the tops of the cakes to create an even surface. Place the largest cake layer on a serving plate or cake board. Spread a layer of frosting on top of the cake layer, then place the next cake layer on top. Repeat this process until all the cake layers are stacked.
Step 4: Carve the Cake
To create the skirt of the Barbie cake, you will need to carve a hole in the center of the stacked cake layers. The size of the hole will depend on the size of the Barbie doll you are using. Place the Barbie doll in the center of the cake and use a knife to trace around the doll, creating a circular outline. Carefully remove the doll and begin carving out the hole, making sure to leave enough cake around the edges for stability.
Step 5: Frost and Decorate the Cake
Once the cake has been carved, it’s time to frost and decorate! Start by applying a crumb coat of frosting to the entire cake. This thin layer of frosting will help seal in any crumbs and create a smooth base for the final layer of frosting. Once the crumb coat is set, apply a final layer of frosting, ensuring that the cake is evenly covered.
Now comes the fun part – decorating the cake! Use different piping techniques, such as rosettes, swirls, or stars, to create texture and visual interest. You can also add edible decorations, such as sprinkles, fondant shapes, or edible flowers, to enhance the overall design. Be creative and let your imagination run wild!
Step 6: Insert the Barbie Doll
Once the cake is fully decorated, it’s time to insert the Barbie doll. Carefully insert the doll into the hole in the center of the cake, making sure that she is secure and standing upright. You can dress the doll in a fondant dress or use a real Barbie doll with a removable dress. Arrange the doll’s dress to cover the hole and create the illusion of a flowing gown.
Step 7: Finishing Touches
To add the finishing touches to your Barbie cake, you can further enhance the design with additional decorations.
Barbie Cakes: A Delightful and Whimsical Choice for Any Celebration

Barbie cakes have become a popular choice for birthdays, celebrations, and special occasions. These whimsical and eye-catching cakes feature a Barbie doll as the centerpiece, surrounded by layers of delicious cake and beautifully decorated with frosting and edible decorations. In this article, we will explore everything you need to know about Barbie cakes, from their history and popularity to step-by-step instructions on how to make your own. So let’s dive in and discover the world of Barbie cakes!
The History of Barbie Cakes
Barbie cakes first gained popularity in the 1960s when the iconic Barbie doll was introduced to the world. The idea of incorporating a Barbie doll into a cake design originated from the desire to create a unique and memorable birthday cake for children. The concept quickly caught on, and Barbie cakes became a staple at birthday parties and special occasions.
The Popularity of Barbie Cakes
Barbie cakes have remained popular throughout the years due to their whimsical and visually stunning designs. These cakes not only serve as a delicious dessert but also double as a centerpiece and a form of entertainment. Children and adults alike are captivated by the creativity and artistry that goes into crafting a Barbie cake. It’s no wonder that Barbie cakes continue to be a favorite choice for birthdays and celebrations.
How to Make a Barbie Cake
Creating a Barbie cake may seem like a daunting task, but with the right tools and techniques, it can be a fun and rewarding experience. Here is a step-by-step guide on how to make your own Barbie cake:
Step 1: Gather Your Ingredients and Tools
To make a Barbie cake, you will need the following ingredients:
- Cake mix or homemade cake batter
- Frosting of your choice
- Food coloring (optional)
- Edible decorations (sprinkles, fondant, etc.)
- Barbie doll
In terms of tools, you will need:
- Round cake pans in various sizes
- Mixing bowls
- Spatula or offset spatula
- Piping bags and tips
- Cake turntable (optional but helpful)
- Scissors
Step 2: Bake the Cake Layers
Start by preparing the cake batter according to the instructions on the package or your preferred recipe. Divide the batter evenly into the round cake pans, ensuring that each pan is filled about two-thirds full. Bake the cakes in a preheated oven until a toothpick inserted into the center comes out clean. Allow the cakes to cool completely before proceeding to the next step.
Step 3: Trim and Stack the Cake Layers
Once the cakes have cooled, carefully remove them from the pans. If necessary, trim the tops of the cakes to create an even surface. Place the largest cake layer on a serving plate or cake board. Spread a layer of frosting on top of the cake layer, then place the next cake layer on top. Repeat this process until all the cake layers are stacked.
Step 4: Carve the Cake
To create the skirt of the Barbie cake, you will need to carve a hole in the center of the stacked cake layers. The size of the hole will depend on the size of the Barbie doll you are using. Place the Barbie doll in the center of the cake and use a knife to trace around the doll, creating a circular outline. Carefully remove the doll and begin carving out the hole, making sure to leave enough cake around the edges for stability.
Step 5: Frost and Decorate the Cake
Once the cake has been carved, it’s time to frost and decorate! Start by applying a crumb coat of frosting to the entire cake. This thin layer of frosting will help seal in any crumbs and create a smooth base for the final layer of frosting. Once the crumb coat is set, apply a final layer of frosting, ensuring that the cake is evenly covered.
Now comes the fun part – decorating the cake! Use different piping techniques, such as rosettes, swirls, or stars, to create texture and visual interest. You can also add edible decorations, such as sprinkles, fondant shapes, or edible flowers, to enhance the overall design. Be creative and let your imagination run wild!
Step 6: Insert the Barbie Doll
Once the cake is fully decorated, it’s time to insert the Barbie doll. Carefully insert the doll into the hole in the center of the cake, making sure that she is secure and standing upright. You can dress the doll in a fondant dress or use a real Barbie doll with a removable dress. Arrange the doll’s dress to cover the hole and create the illusion of a flowing gown.
Step 7: Finishing Touches
To add the finishing touches to your Barbie cake, you can further enhance the design with additional decorations. Consider adding edible glitter, pearls, or edible flowers to create a touch of elegance. You can also use food coloring to create vibrant and eye-catching designs on the cake. Let your creativity shine as you add the final details to your Barbie cake.

Tips and Tricks for Making a Barbie Cake
- Use a cake turntable to make frosting and decorating the cake easier. It allows you to rotate the cake as you work, ensuring even coverage and smoother decorations.
- If you don’t have a cake turntable, you can use a lazy Susan or even a large plate placed on top of an overturned bowl.
- To prevent the cake from sticking to the pan, line the bottom with parchment paper and lightly grease the sides.
- When carving the hole for the Barbie doll, make sure to remove any excess cake crumbs to create a clean and stable base for the doll.
- If you’re using a real Barbie doll, make sure to remove any non-edible parts, such as the legs, before inserting it into the cake.
- Experiment with different frosting techniques and colors to create unique and personalized Barbie cakes.
- Don’t be afraid to get creative with the decorations. You can use fondant to create intricate designs or even incorporate other edible elements like macarons or chocolate decorations.
Frequently Asked Questions (FAQ)
Q1: Can I use any Barbie doll for a Barbie cake?
A1: Yes, you can use any Barbie doll for a Barbie cake. However, it’s important to make sure that the doll is clean and doesn’t have any non-edible parts. You can also use a doll with a removable dress or dress the doll in a fondant gown.
Q2: How far in advance can I make a Barbie cake?
A2: It’s best to make a Barbie cake the day before or the day of the event to ensure freshness. However, you can bake the cake layers in advance and freeze them until you’re ready to assemble and decorate the cake.
Q3: Can I use a different type of cake instead of a traditional sponge cake?
A3: Absolutely! While sponge cake is the most common choice for Barbie cakes, you can use any type of cake that you prefer. Just make sure that the cake is sturdy enough to hold the weight of the doll and the decorations.
Q4: Can I make a Barbie cake without using fondant?
A4: Yes, you can make a Barbie cake without using fondant. You can decorate the cake using only buttercream frosting and edible decorations like sprinkles, edible flowers, or chocolate decorations.
Q5: How should I store a Barbie cake?
A5: Once the Barbie cake is fully decorated, it’s best to store it in a cool, dry place away from direct sunlight. If the weather is warm, you can also refrigerate the cake to prevent the frosting from melting. Just make sure to bring the cake to room temperature before serving to enhance the flavor and texture.
Conclusion
Barbie cakes are not only delicious desserts but also works of art that can make any celebration extra special. With their whimsical designs and eye-catching decorations, these cakes are sure to impress both children and adults alike. Whether you choose to make your own Barbie cake or order one from a professional baker, the joy and excitement that a Barbie cake brings to a celebration are unmatched. So why not add a touch of magic and elegance to your next birthday party or special occasion with a stunning Barbie cake? Let your creativity soar and create a cake that will be remembered for years to come.
Remember, Barbie cakes are not just desserts; they are an experience that brings joy, wonder, and excitement to any celebration. So go ahead and indulge in the whimsy and beauty of a Barbie cake. Let your imagination run wild as you create a masterpiece that will leave everyone in awe. Whether you’re a seasoned baker or a beginner, making a Barbie cake is a delightful and rewarding experience that will make your celebration truly unforgettable.
So what are you waiting for? Gather your ingredients, unleash your creativity, and let the magic of Barbie cakes take center stage at your next celebration. Happy baking!


